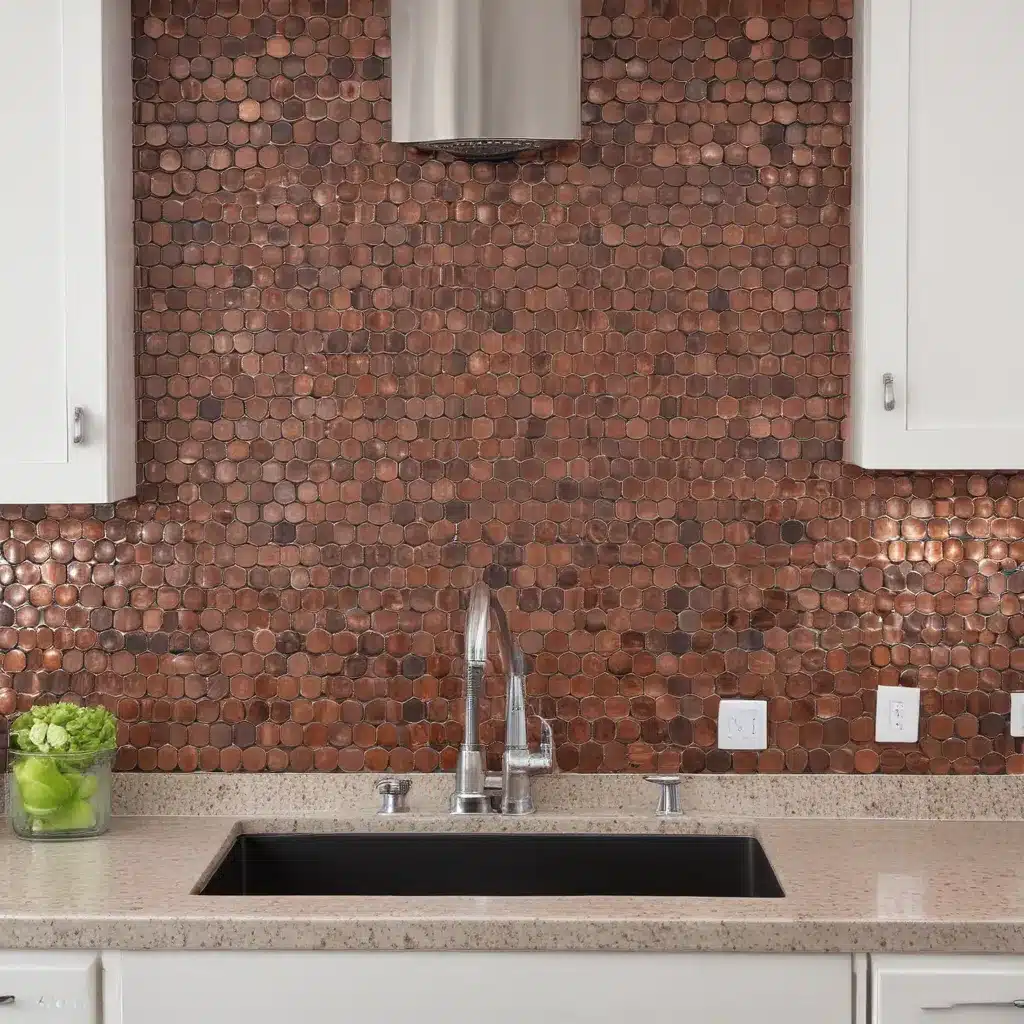
Tackling Tiny Tiles: A Tile-Drunk Renovation Journey
I’ve always been a bit of a renovation junkie – you know, the kind who gets giddy over the prospect of picking out new tile or planning the perfect backsplash layout. So when it came time to refresh the kitchen in our Aberdeen home, I knew I wanted to go big. And by big, I mean covering the entire back wall in a dazzling floor-to-ceiling penny tile backsplash.
Was it an ambitious undertaking? Absolutely. Did it make me want to poke my eyes out with those tiny tile bits every now and then? You bet. But when I step back and admire the end result, I can say with certainty: it was 100% worth it.
Falling for Penny Tile
Now, you may be wondering, “Why on earth would you choose penny tile, of all options?” Well, let me tell you – there’s just something so charming and unique about those little round tiles. They add an extra dose of personality and texture to a space that you simply can’t replicate with standard subway or square tiles.
Plus, penny tile is incredibly versatile. Pair it with dark grout for a classic, old-world cafe vibe, or opt for a more modern, tone-on-tone look with light grout. And the fact that it has a textured, non-slip surface makes it perfect for high-traffic areas like kitchens and bathrooms.
As a self-proclaimed “tile perfectionist” shared, “When done right, it adds so much personality and texture to a space.” And that’s exactly what I was after for our kitchen renovation.
A Tile-Laying Odyssey
Now, I won’t sugarcoat it – laying penny tile is no walk in the park. In fact, the folks at Young House Love described it as a “tile-drunk renovation journey” – and I couldn’t agree more.
The biggest challenge? Minimizing those pesky seams between the tile sheets. See, with penny tile, there are hundreds of individual tiles per square foot, all needing to be placed just so to create a seamless, cohesive look. It’s a meticulous process, to say the least.
As the “tile perfectionist” from Foxy Oxie shared, “The biggest challenge of installing penny tile – and why certain contractors outright refuse to do it – is that it’s very difficult to minimize those obvious seams between sheets of tile.”
But I wasn’t about to let a few tricky seams deter me. I was determined to create a backsplash that would wow everyone who stepped foot in our kitchen. So I rolled up my sleeves, grabbed my trusty trowel, and got to work.
Mastering the Meticulous
The first step was getting the wall prepped and ready for tile. We sanded the existing painted drywall to rough it up and ensure the thinset (that’s tile-speak for mortar) would adhere properly. Then, it was time to start the tiling process.
As designer Oksana shared in her video tutorial, the key to minimizing those pesky seams is to work in a staggered pattern, aligning each sheet of tile just slightly off from the ones next to it. That way, your eye doesn’t get drawn to one continuous line running across the wall.
I also found it helpful to have a system for keeping track of the different tile sizes – full tiles, half tiles, quarter tiles, and so on. That way, when it came time to fill in those edges and corners, I could quickly grab the right piece without having to stop and cut anything.
Speaking of cutting, that’s a whole other beast with penny tile. Unlike larger format tiles, you can’t just slice through them with a wet saw. Nope, it’s all about tile nippers – those heavy-duty wire cutters that require a firm, confident grip. Let me tell you, by the end of the day, my thumbs were screaming.
Grout, Grout, and More Grout
Finally, after what felt like an eternity of meticulously placing each and every tile, it was time for the grouting stage. And let me tell you, that was no easy feat either.
As the team at Young House Love described it, “Grouting penny tile is extremely time-consuming. Think about it, each 12×12″ sheet of penny tile has 240 individual tiles, and you have to make sure each of the joints between those 240 tiles are properly filled with grout.”
Needless to say, I spent a lot of quality time with my grout float that day. But once the dust (or rather, grout haze) settled, I have to admit – it was all worth it. The end result is a backsplash that truly makes a statement, elevating the entire look and feel of our kitchen.
The Penny Tile Payoff
So, was it easy? Absolutely not. But was it worth it? You bet. Because now, every time I walk into my kitchen, I’m greeted by a backsplash that’s brimming with character and charm. And really, that’s what a home renovation is all about – creating a space that reflects your personal style and makes you smile every time you see it.
If you’re considering tackling a penny tile project of your own, my advice is simple: go for it! Just be prepared to put in the time and effort. Trust me, your patience will be tested, your arms will ache, and you may even feel the urge to swear off tiny tiles forever. But when you step back and admire your handiwork, I guarantee it’ll all be worth it.
Now, if you’ll excuse me, I’m off to plan my next big renovation project. Who knows, maybe I’ll even tackle the floors next. After all, ABC Home has some beautiful options that are just begging to be installed…


